Maintaining your vehicle's braking system is crucial for safe driving, and brake drums play a vital role in this process. If you're experiencing issues with your brakes or suspect your brake drums need attention, this article will guide you through understanding, diagnosing, and repairing brake drum problems. Whether you're a car enthusiast or a daily commuter, learning about brake drum repair can help you make informed decisions for your vehicle's maintenance.
Understanding Brake Drums
Brake drums are an essential part of a drum brake system, commonly used in the rear brakes of many vehicles. Unlike disc brakes that use calipers and pads, drum brakes use a set of shoes that press outward against the drum to slow down or stop the vehicle. When the brake pedal is pressed, hydraulic pressure forces the brake shoes against the inside of the spinning drum, creating friction and slowing the wheel's rotation.
Components of a Brake Drum System:
Brake Drum: The cylindrical component that rotates with the wheel.
Brake Shoes: Curved friction material that presses against the drum to create braking force.
Wheel Cylinder: Hydraulic component that pushes the brake shoes against the drum.
Return Springs: Springs that pull the brake shoes back to their resting position when the brake pedal is released.
Backing Plate: A metal plate that holds the brake shoes and other components in place.
Common Signs of Brake Drum Issues
It's essential to recognize the warning signs of brake drum problems early to prevent further damage and ensure safe driving. Here are some common indicators that your brake drums may need repair or replacement:
- Squeaking or Grinding Noise: A high-pitched squeaking or grinding noise when braking can indicate worn brake shoes or a damaged drum.
- Reduced Braking Performance: If you notice your vehicle takes longer to stop or requires more pedal pressure, it could be due to worn brake components.
- Vibration or Pulsation: Feeling a vibration or pulsation in the brake pedal or steering wheel during braking may indicate warped or out-of-round brake drums.
- Pulling to One Side: If your vehicle pulls to one side when braking, it could be a sign of uneven wear in the brake drums.
- Brake Pedal Feels Soft: A spongy or soft brake pedal may indicate air in the brake lines or a problem with the drum brake system.
Diagnosing Brake Drum Problems
Before attempting any repairs, it's essential to diagnose the specific issue with your brake drums. Here are some steps to help you identify common brake drum problems:
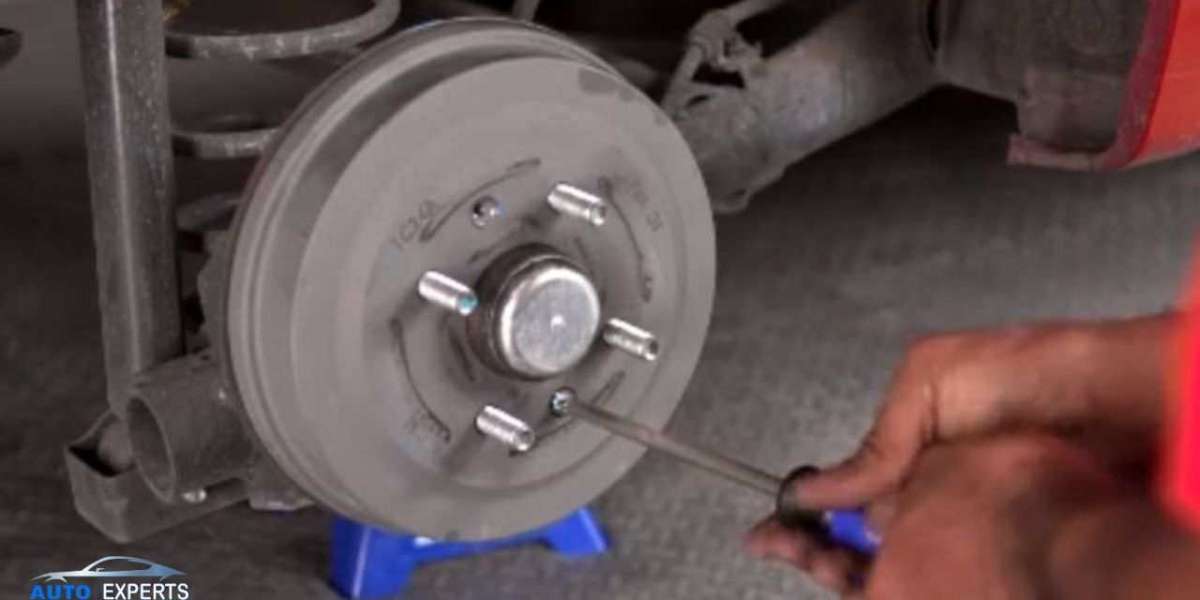
- Visual Inspection: Remove the wheel and inspect the brake drum for signs of damage, such as cracks, scoring, or uneven wear. Check the brake shoes for wear and ensure they have adequate friction material.
- Measure the Drum: Use a micrometer or drum gauge to measure the brake drum's internal diameter. Compare the measurement to the manufacturer's specifications. If the drum is worn beyond the acceptable limit, it needs replacement.
- Check the Wheel Cylinder: Inspect the wheel cylinder for leaks or damage. A leaking cylinder can cause brake fluid to contaminate the brake shoes, reducing braking efficiency.
- Examine the Return Springs: Ensure the return springs are intact and provide adequate tension. Weak or broken springs can lead to uneven shoe wear and poor braking performance.
- Look for Contamination: Check for oil or brake fluid contamination on the brake shoes and drums, which can reduce friction and lead to braking issues.
Steps to Repair or Replace Brake Drums
If you've identified that your brake drums require repair or replacement, follow these steps to address the issue:
Tools and Materials Needed:
Jack and jack stands
Lug wrench
Wrench set
Brake drum puller (if necessary)
Micrometer or drum gauge
Brake cleaner
New brake shoes and drums (if needed)
Brake fluid
Step-by-Step Process:
Prepare the Vehicle: Park the vehicle on a level surface and engage the parking brake. Loosen the lug nuts on the wheels you'll be working on, then jack up the vehicle and secure it on jack stands. Remove the wheels.
Remove the Brake Drum: Carefully remove the brake drum from the hub. If the drum is stuck, you may need a brake drum puller to remove it.
Inspect and Clean Components: Inspect the brake shoes, wheel cylinder, and other components for wear or damage. Clean the brake assembly with brake cleaner to remove dust and debris.
Replace Brake Shoes (if needed): If the brake shoes are worn or damaged, replace them with new ones. Follow the manufacturer's instructions for installing the new shoes.
Measure and Replace the Drum: Measure the brake drum's internal diameter to ensure it meets the manufacturer's specifications. If the drum is beyond the acceptable limit, replace it with a new one.
Reassemble and Adjust: Reinstall the brake drum over the new shoes. Adjust the brake shoes to ensure they make light contact with the drum when the wheel spins. This ensures proper braking performance.
Bleed the Brakes (if necessary): If you've replaced or worked on the wheel cylinder, bleed the brakes to remove any air from the system. Follow the manufacturer's procedure for bleeding the brakes.
Reinstall Wheels and Test: Reinstall the wheels and hand-tighten the lug nuts. Lower the vehicle and fully tighten the lug nuts to the specified torque. Test the brakes by taking a short drive to ensure they function correctly.
Importance of Regular Brake Maintenance
Regular brake maintenance is essential for the safety and reliability of your vehicle. By keeping your brake drums and other components in good condition, you can prevent costly repairs and ensure your vehicle stops efficiently. Here are some tips for maintaining your brake system:
Regular Inspections: Schedule regular brake inspections to identify potential issues before they become serious problems.
Brake Fluid Check: Check the brake fluid level regularly and top it off if necessary. Ensure the brake fluid is clean and free from contamination.
Address Issues Promptly: If you notice any signs of brake problems, address them promptly to prevent further damage and ensure safe driving.
Follow Manufacturer Recommendations: Adhere to the manufacturer's recommendations for brake maintenance and replacement intervals.
Drive Safely: Avoid aggressive driving and excessive braking to prolong the life of your brake components.
Conclusion
Understanding brake drum repair is crucial for maintaining your vehicle's safety and performance. By recognizing the signs of brake drum issues and following the steps for diagnosis and repair, you can ensure your brakes remain in excellent condition. Regular maintenance and prompt attention to brake problems will help you enjoy a safe and smooth driving experience. Remember, when in doubt, consult a professional mechanic for expert advice and assistance with brake drum repairs.