In-ground lights are a versatile and aesthetically pleasing option for industrial settings. They provide both functional and decorative lighting, enhancing safety and visual appeal. This guide will walk you through how to install in-ground lights effectively.
Understanding In-Ground Lights
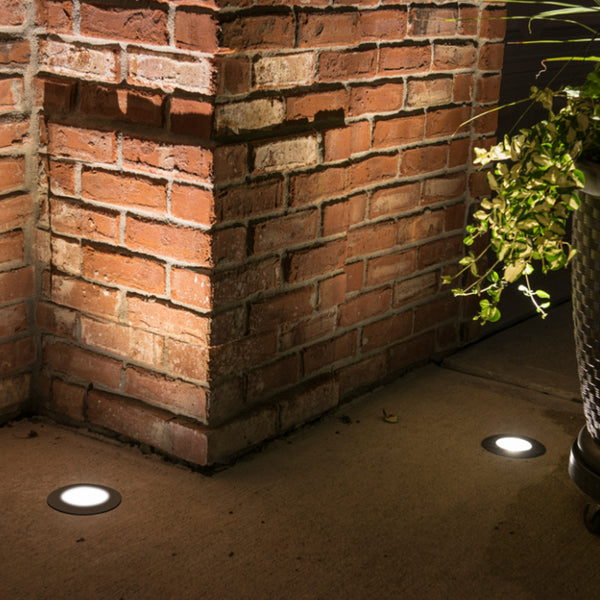
Before diving into the installation process, it is essential to understand what in-ground lights are and their benefits. These lights are installed flush with the ground, making them ideal for areas where traditional lighting fixtures might be impractical or visually intrusive.
Benefits of In-Ground Lights
- Enhanced safety and visibility
- Durable and weather-resistant
- Energy-efficient options available
- Minimal visual impact
Preparation for Installation
Proper preparation is crucial for a successful installation. Here are the steps you need to follow:
Gathering Tools and Materials
Ensure you have all the necessary tools and materials before starting the installation. You will need:
- In-ground lights
- Shovel or trenching tool
- Electrical wiring and connectors
- Gravel or sand for drainage
- Waterproof sealant
Planning the Layout
Plan the layout of your lights carefully. Consider the areas that require illumination and the spacing between each light. A well-thought-out layout ensures even lighting and enhances the overall aesthetic.
Step-by-Step Installation Process
Now that you are prepared, let's go through the how to install in-ground lights process step by step.
1. Mark the Locations
Mark the locations where you want to install the lights. Use stakes or spray paint to indicate the spots.
2. Dig the Holes
Using a shovel or trenching tool, dig holes at the marked locations. The depth of the holes should be sufficient to accommodate the light fixtures and allow for proper drainage.
3. Install the Wiring
Lay the electrical wiring in the trenches, ensuring it is properly insulated and protected. Connect the wires to the power source, following the manufacturer's instructions.
4. Place the Lights
Place the in-ground lights into the holes, ensuring they are level with the ground. Add gravel or sand at the bottom of the holes to facilitate drainage.
5. Seal and Test
Apply waterproof sealant around the edges of the lights to prevent water ingress. Once sealed, test the lights to ensure they are functioning correctly.
Maintenance and Safety Tips
Regular maintenance is essential to keep your in-ground lights in optimal condition. Here are some tips:
- Inspect the lights periodically for any signs of damage or wear.
- Clean the light covers to ensure maximum brightness.
- Check the wiring and connections for any issues.
“Proper installation and maintenance of in-ground lights can significantly enhance the safety and aesthetics of industrial settings.”
Conclusion
Installing in-ground lights in industrial settings can be a rewarding project that enhances both safety and visual appeal. By following this guide on how to install in-ground lights, you can achieve a professional and durable installation. Remember to plan carefully, use the right tools, and perform regular maintenance to ensure your lights remain in excellent condition.
For more information and to explore a range of in-ground lighting options, visit our website.
References